





Letter Creator IMF Preview Tutorial
This is a tutorial designed to assist those who create Incredimail stationery in creating a preview of your letters to share on your blogs or web sites to enable others to download your letters.
How to Share Your Incredimail Letters on Your Blog
I have had several people ask me how to go about sharing their Incredimail letters that they create on their blog for others to snag as well that are not part of the Yahoo and Google groups that they share them in, so I decided to whip up this tutorial for you and make it nice and simple!
You need a file cabinet on Google Sites to upload your files to. (The reason I suggest Google sites versus 4Shared is that you do not have to wait for the download, and the people saving your letters do not have to click on several different links or wait to receive the letters – makes for happy downloaders who will continue to come back to your site because you've made it easy to receive your letters!)
Easily Share Your Blog Button with Readers
Ever wonder how to share that pretty blog button you designed and slaved over for hours with others so they could post it on their blogs as well? Well here's the easy way to share (and more people will share your blog button if you 'do the work' for them!) your blog button!
Setting Up an Email Rule
Once we begin working on your design project, it is vitally important that you remain available once you are given a project start date on a daily basis. This enables us to remain on task and have any questions we may have answered in a timely manner. The best way to do this is to set up an email rule for our messages.
To ensure that you do not miss any messages from me when we begin working on your project, set your rule to search for all messages with the subject MCM Project (which is the subject line we will use for all communications with you) and have the rule set to mark all of these messages in red so that they are highly visible when arriving in your inbox.
Adding a Blog Author or Admin Member
There are times when you may need to grant someone administrative or author privileges for your blog. This is a tutorial to show you how to do just that.
Log in to your Blogger account and go to your dashboard. Locate the name of the blog you wish to grant access to from your list of blogs as shown below. For purposes of this tutorial we are going to use My Creative Muse as the blog of choice. Just click on the name of the blog to go to your next screen.
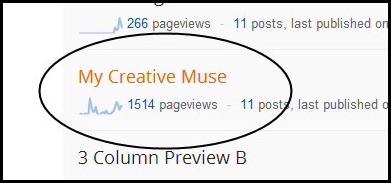
Once you have done this, you will see the listing shown below on the left side of your screen. You need to scroll down to the Settings section and click on that.

Your next step is going to be inviting the person to contribute to your blog. Go to your Permissions area and add the individual as a Blog Author by clicking on Add Authors as circled below. If you are granting permission to me to do your blog design – please use the email address shown below. If you are using this for another individual, please be sure to use their Google/Gmail email address.

Once you have done this, the recipient will receive a notification via email that they have been invited to contribute to your blog. They must click on the link in the email in order to be approved as an author.
If the individual is only going to be contributing content (blog posts) on your blog – you are finished.
If the individual is going to be updating your blog layout and design – you need to grant Admin privileges as shown below.

That's all there is to it!